Tuesday 27 September 2011

What makes a good Action Point presentation?

Once the basics have been learnt, and your classes have got over the novelty of using the remotes it's time to crank it up a notch.


1) The students need to be making progress. 
You have the full attention of as class determined to get the correct answer, now is the ideal time to ask them those questions that need a little more thought. There's no point asking them 20 questions with the same level of difficulty. That's boring and in all likelihood the same person will win every round.

During my NQT year my (outstanding) lesson was observed by Ofsted. During my feedback I was told that one of the reasons the inspector had been so impressed with the lesson was that I have used ActionPoint to aid the learning, not just as "something fun to do". I'd asked questioned that had made the class think a little. Discussion amongst students was encouraged.

2) Use variety.
Don't just ask multiple choice questions all the time, particularly if a bit of thought is needed. The majority of students will rush to put their answer in without carefully considering the choices. Use the numeric, short text, and ordering answer types to add a bit of variety.

3) Make simple slides.
The slides don't have to be really fancy. Keep the questions short and simple. The only bit that really matters is the question. Pictures can be good in moderation, but don't crowd the slide.

4) Use the data.
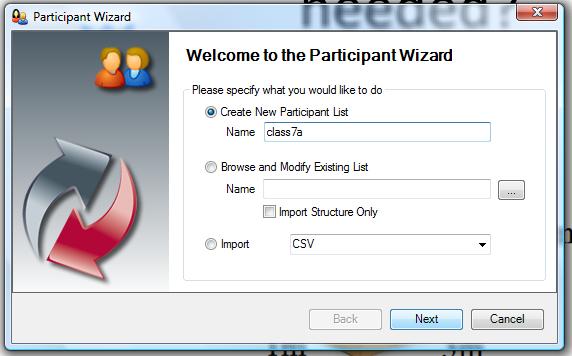
There's an immense amount of data available if you save the results. You can look at detailed response for each student, and each question. You can study the common misconceptions, and use these in discussions with the class. It's possible to print off a slide by slide report for each student. I will be going into alot more detail over the next few weeks.

In my opinion the feedback data is the biggest strength of using Qwizdom. To get the best out of it you will need to set up participant lists.

5) Check progress.
If you freeze the screen you can use the graphs function to see up-to-date data from the class. You can see the times and the answers for each student. Keep an eye on these, you may spot students who are rushing, struggling, or just not taking the lesson seriously. This can be done to a limit extent using the teacher's remote. If I find a student not taking the lesson seriously I threaten to have them back after school going through it on paper instead of on the remotes. They soon get the message.

6) Do a bit of teaching.
You don't have to ask questions. Between question slides you may with to teach them something new. They may be more keen to listen knowing that the next series of slides will be related to what you are teaching them.

7) Walk as you talk.
You don't have to be tied to your computer/whiteboard to run Qwizdom. Everything needed to run the presentation can be done using the grey teacher remote. This allows you to discuss questions with small groups, and keep an eye on the student who has decided not to take it seriously. Again, I will be adding more details over the next few weeks.

8) Give rewards.
I keep a record of the students who finish in the top 8. These will receive merits, particularly those who don't often win.

Sharing slides

One of the downsides to using Qwizdom is that it does take a fair bit of time to write the presentations in the first place, particularly if you are new to using Action Point. Once you've been using Qwizdom for a while you will have built up a fairly decent library of presentations that you can use.

At my school we not only share our slides with each other via the VLE, but also with other Maths teachers across the city via dropbox.

Qwizdom have started to build up a fairly large library of presentations for a number of different subjects. These can be found here. The team are always on the look out for more presentations to add, so if you think you have something fresh then do get in touch with them.

Friday 25 February 2011

Further use of Answer Key

There are two extra options that I highly recomend using with Answer Key. Firstly the use of Participant lists (see previous blog entry) is excellent since you get to see each student's name on each row. Secondly you can set it up so that students are working on different sets of questions.

Using Participant lists
The only difference to setup here is making sure that you select the participant list that you have created for you class in the setup:
Also ensure that you've checked the Require Login by ID box. Don't worry if the students can't remember their login ID because it will be shown on the next screen. There's no point in showing the login screen either. I tend to come round to each table in my classroom to remind them how to use the controllers rather than getting them all to start at once.

Once you've launched the session you will again get your Paper-Based Score Entry screen, except this time there will be a few extra details:
In the first column you will have the names of each member of your class, and in the second column their logins. When the students switch on their controllers it will ask them to enter their Participant ID, this is the number they have to enter for the comuter to know who they are. Of course you may wish to enter these ID numbers yourself without telling your class that you know who is who.


Multiple Presentations
If you have a mixed ability class you may wish to have them working on different question sheets simultaneously. You can do this provided that you have the latest edition of Answer Key (there was a bug with the previous version which prevented multiple presentation).

First of all you need to create the Answer Keys for each question sheet, and take note of their TestNumber, each Answer Key should have a seperate TestNumber. You must mke sure that these answer keys are put in the same folder on your computer.
For me I have created 'testa' with TestNumber 11562755 and 'testb' with TestNumber 1156280

Instead of presenting in the usual way you need to use the drop down box to select Present Multiple.
You will then be invited to select the folder on your computer that houses these answer keys. This will now prompt the Setup Menu to open:
The only change should be that instead of saying 'Self Paced Mode' it now says 'Multiple Self Paced Mode'.
You will need to write on the question sheets the TestNumber because the students will be asked to enter this when they switch on their remotes so that the computer knows which set of questions they are working on. As far as I'm aware it is not possible to assign students to a work sheet automatically.

The Paper-Based Score Entry sheet looks very similar to before. The only difference is that we can now see which work sheet each student is working on by looking at the number in the TestNumber column:
From the above I can see that Nick Adams is working on 'testa' (since it has TestNumber 11562755) and has got the first two questions correct.

Since the students are working on sets of questions you may wish to order the students by 'TestNumber' instead of the default 'Remote#'. To do this click on the TestNumber heading.

Using Answer Key

Teacher

Once you've launched an Answer Key you will be greeted with the Paper-Based Score Entry screen. As follows:
This window updates as students submit their answers. The numbers across the top are the question numbers, and if they get it correct they will get a green tick, and if they get them wrong they get a red cross. This allows you to see immediately who needs help, and which students perhaps need to be working on harder questions. You can also really quickly get an idea of which questions the class as a whole are struggling with.
If your screen is on full view in you classroom you may wish to put up the privacy screen. To do this check the box at the top, and the marks will be covered up. To end the session just click 'End Session' and you will be given the option to save the scores.

Students
Once a student has completed question one they can input this into their Qwizdom remote. They should notice that it says Q#1 or Q#001 on their remote. If not then they need to use the arrow buttonsto cycle through to the correct number question. They then type in their answer and submit to the computer in the usual way. 

If they are correct then they should go onto further questions by using the right arrow. If they get it wrong they can still carry on, but may wish to try again. To try again they can simply delete their previous answer by using the 'c/cancel' button or the 'Del' key. You do of course have to enable this option in the setup.

Launching an Answer Key

After a while using Action Point I deceded to explore the other uses of Qwizdom. In the package along with Action Point there is a simple programme called Answerkey. This has non of the fancy gam, but does allow students to work through questions at their own pace, and self mark them with the help of Answerkey.

In my class if I am working on a topic which requires them to practice a method several times I will hand out a work sheet with say 20-40 questions on it. Instead of hving a class full of students asking me if they are doing it correctly, or even doing them all wrong they can use the controllers to get immediate feedback.

once a student has finished a question, they input their answer into the controller and will be told if their answer is correct. If it is they can then tick it off in their book, if it's incorrect they can try again and iff necessary ask for help.

Load up Anskerkey and you will be greeted with this window:
I'm not entirely sure what te 'Assigned Standards' bit means yet, so feel free to close that bit since I won't be reffering to it here.

For this guide suppose I have handed out the following questions on a work sheet:
Q1) 2+4 =
Q2) 3+7 =
Q3) 13-4 =
Q4) 23+14 =
Q5) 23-6 =
Q6) 3x4 =
Q7) 31x4 =
Q8) 7x3 =
Q9) 3+9 =
Q10) 3-8 =

We now need to tell Answerkey what the answers are to these questions. Click on the Insert icon: 

An extra row should have been added to the answers grid:
The first column tells us hich question it is. The Question Type column lets you elect which type of question (numerical, text, multiple choice etc) and the third column is what the correct answer is. I haven't used the Points or Categories option yet, but it does have more use than it did with Action Point since you can weight harder questions with more points.

Simply click where it currently says 'None' to change the Question Type, a drop down menu should appear:

Do the same to change for the Answer column, but a pop up window will appear instead just like in Action Point (if you have the old version of the software you just type in the answer, there is no pop up window).

Here I have filled in the answer to my question 1:
For my question there is an exact answer, so I put that in as a Numeric answer rather than a Numeric Range answer. Notice how there are three seperate rows to put an answer in. This means that I can accept more than one correct answer. If your anwer is a fraction you can check the box that automatically converts fractions to decimals, so 1/2 is the same as 2/4 or 3/6.

If you are using the Q5 remotes then leave the top box blank. I have been borrowing a set of Q6 remotes so I can make the question can appear on the screens instead of having to hand out sheets.

The bottom box will allow all answers within a certain range, even to a specified number of decimal places. This is ideal if using more complex trig or mechanics questions that might use rounded values in the working out.

When you are ready to launch an answer key session (I usually already have the students working through the questions at this point) click on the Present icon in the menubar:

The presentation setup window will pop up, this should see very familiar:
If you use Participant Lists then they come in very handy for Answer Key (more on those later). You may like to save the results, but you must ensure that it is presented as 'Self-Paced Mode'. For the students to get the most out of Answer Key you will want the Feedback box to be checked, and so long as it isn't a multiple choice worksheet then you may wish students to be able to change their answers.

Finally check that the receiver info is displayed on the Login tab as below:
If this box is blank then you will have to remove the Qwizdom icon from the taskbar.

Saturday 18 December 2010

Using Quandry

Most of the time I use Mission to Mars or Fastrack, but there are also a couple of team based games. One of them is Baseball (which is an awfully dull sport, and you risk your class falling asleep if you use it), there other is Quandry which is alot more exiciting.

For a Quandry presentation you ideally need 25 questions, preferably split in 5 categories, with questions getting progressively harder. For example I have produced this general knowledge Qwizdom. The first 5 questions are all Geography based, with Q.1 being the easiest, and Q.5 being the hardest.

Setting up a Quandry Presentation
Click on the Presentation Setup icon. This will bring up the usual window. Obviously you need to select Game: Qunadry. This brings up a new Setting button. Before clicking on this button I would advise you to remove the 'Right/Wrong feedback' option. Being a team game, if one person knows they have it right, then everyone on their team will just copy them. You may wish to allow them to change their answer.

Now click on Setting to edit your Quandry settings.
You need to tell the computer what each of your five categories are, and which slides it should assign to those categories. You then get to chose how the team scoring is administered, I prefer the points to be assigned by the percentage of correct answers on your team since it encourages more involvement from the weaker students. Finally choose the number of teams you want. I have my class room arranged into 7 blocks of tables, so will use them as my teams.

Click OK to start up the presentation as normal. You will be greeted with the following screen:
This how what team each player is in. As far as I'm aware it is completely random, and seems to take all 32 controllers into account. I don't think it is possible to move players either. However it is possible to assign students to a group if you are using a Participant List.

Clicking on Categories take you through to the question board:
There are 25 questions available, with 5 questions worth different amounts in each category. Just click on one to select that question. You may wish to use the 'random participant' feature on the toolbar and get your students to pick a question.

Once everyone has submitted their answers, click on the game icon in the normal way and the points board will come up:
In this example it was a 200 point question. Teams 4 and 6 both got 200 points because all their team entered the correct answer. Team 5 only got 100 points because only half their team got the correct answer.

The beauty of Quandry is that you can finish at any time. You do not have to complete every question. Students differentiate the questions themselves by chosing the categories and level of diffuculty.

Friday 17 December 2010

Creating a Participant List

Although it's fun to play Qwizdom games with you class, to get the most out of it you need to create a participate list. This requires every user to log in with a unique ID number, and means that instead of looking at the results for "Participant #5" you are looking at the results for "Joe Bloggs".

You school may have unique ID numbers for each student which could be used. Our school subscribes to mymaths.co.uk so each student already has a 3/4 digit login number, so I make sure it is the same number. It is possible to import a current list from excel, but I'm going to show you how to create a simple participant list from scratch.

In Action Point (or Answer Key) click on the icon of the two people:

This brings up the Participant Wizard.
 Press the Create New Participant List button, and fill in the name of your class then click Next.

You'll be taken to this window:
Select Educational, then click Next.

You're now at a window where you get to chose which information will be stored for each participant.
 You only really need First Name, Last Name and ParticipantID (this is their login number). To remove/add a field, click on it and move it across using the arrows. The list on the right are the fields that we will be using. At a later date I will show you what can be done with the other fields. Click Next.

On this page you can fill in all the details for your students.
The Remote # is allocated automatically, you obviously need to put in the names for each of your students, but also the ParticipantID, the is the number that they will use to login. When you're done click Finish and it'll ask you where you want your Participant List saved. They save as a .QPL file.